top of page

Short Films
As a student, I have created a few short films individually and collaborated on others with my colleagues. Inspired from Tim Burton and Zootopia to Norman McLaren's short animations, I have experimented with my skills to the fullest. The learning curve was at its peak when I worked on the production of these films - from script to submittal. They taught me how to bring together a vast skillset to produce an output that inculcates all forms of visual creativity. I used Maya for all my 3D films with the aid of Arnold Renderer for the final outputs. The experience was indulging and cathartic as a young mind looking to be inspired.


This is an experimental animation I made as a student. It has been inspired in many ways, but I created this version using Adobe After Effects. Experimenting with 2D motion graphics was my first step in creating an abstract visual experience. The narrative and the music create mellifluous synchronicity that is enticing to the viewer giving an insight into how drug abuse worsens over time only to be met with eventual withdrawal. For the pre-production, I wrote the script and worked on the storyboard and the animation. Along with this, I designed a character that fit the narrative of my story. During production, the environment, the effects, and the animations were brought together frame by frame, and the final output was rendered. For post-production, a film poster, a CD cover, and documentation was created. A memorable experience!
Process and Technique
Visual
The idea of this film was to allow me the full creative freedom to experiment with animation. Firstly, I created a storyboard to outline the narrative. The protagonist of the short film was based on a robot-bird-like creature. A character sheet was prepared after sketching and ideating. I first created the character with a 2D vector using Adobe Illustrator and rigged it for animation. I also used Photoshop and Illustrator to establish a visual theme. The cross compatibility between Illustrator and After Effcects allowed me to have a smoother workflow. Each body part was layered separately to use rotations along an anchor point for animation. After importing the character into After Effects, I began the animation process. Like 3D animation, poses are keyed to create the illusion of animation. Through extensive key-framing, colors, shapes, and patterns were animated. Shape layers were used for morphing transitions and creating a fluid motion. Masking and matting were used to reveal and conceal layers dynamically. The use of custom glows and gradients allowed me to add visual appeal. I experimented with the Trapcode suite plugin (particular, Form, and Tao) to create the visual fx of a kaleidoscopic world with shifting patterns and glowing textures. Each scene bursts with life weaving an abstractive narrative of transformation and self-discovery. After all the animation was created and sequenced, Adobe Media Encoder was used to render in high-quality H.264 format. Multipass rendering was used to assert separate control over effects and animations created in layers. The pipeline ensured a visually captivating and a technically polished film blended with innovation.
Sound Design
The audio of this film was edited using Adobe Audition. I added custom sound effects for dynamic motion. I have layered some of my favorite music to complement the visual experience. For the first sequence, I have used 'Empire Ants' by Gorillaz followed by 'Marooned' and 'Echoes' by my favorite music group Pink Floyd. I edited and created a blend of these tracks to create a mesmerizing audio-visual experience.
Groundbreaker was a graduation project as a student of Multimedia. This time, I wanted to create something representing the industry standard of 3D animation. My love for animals was another reason for me to pursue this theme. The narrative follows the personification of pride and envy as a character. The visual inspiration and character development came from Disney's Zootopia. From writing the script to rendering and editing the final output, it was a studio-like experience to create a short film with modern techniques. The set was modelled and optimized for smooth animation and rendering. The pre and post-production followed a production pipeline used by studios. Since this was a 3D film it had many other layers of production like modeling, rigging, texturing, shading, lighting, animation, and rendering. All these processes were hardware and software-intensive but ultimately, the final product was satisfying.
Process and Technique
Pre-production and modelling
The initial requirement was a script. I wanted to depict the age-old concepts of pride and envy in a modernized and friendly way. After screenwriting this story, I developed character outfits and expressions through sketching and 2d vector software. It was important to create an expression sheet as most of the story revolves around the opposite personalities of the characters and therefore, their expressions. After the finalization of the characters and their appearance, the 3D production process was started. I used Autodesk Maya to model and customize the two characters and their props (shovels, sunglasses, etc.) I had to keep the models within polygon limits as this wasn't a visualization project and would be used in full-fledged animation scenes. I rigged the character with armatures with switchable inverse kinematics and forward kinematics.
The Rig
Even though every project involves technical solutions to some degree, one such occasion occurred during this project when I had to tackle a gimbal lock situation during the rigging stage.
The rigging phase is tricky as it requires an intricate understanding of the three-dimensional skeletal structuring of an armature that makes it animatable. With a manual rig, each bone and joint is carefully placed as per the character’s physiological feature — in this case, it was a biped hybrid rabbit. The rig (skeleton) interacts with the mesh of the model and allows us to animate the mesh in desired ways. Each joint has a weightage assigned to it; it determines the degree of influence a joint has on the mesh in the targeted area. During the weight painting, all joints must have the right amount of influence for the animation to be smooth. The trickiest part, however, was the switch between forward and inverse kinematics; it allowed the character to perform complex tasks. The problem first occurred after the rig was complete, I switched the character from forward to inverse kinematics resulting in a torn mesh, and the clavicle joint went into a gimbal lock; rendering the character unusable. This had occurred due to a dynamic morphing issue; the design had modular/interchangeable parts that had caused a misalignment between the IK setup and the mesh. It also occurred because the IK system relying on Euler angles caused an overlap of rotational axes. The solution had to be a step-by-step fix of the rig:
Adjusting weightage: The first step involved in solving this was removing any and every unintended influence from the mesh. I implemented a smart paintbrush tool that identifies overlapping vertices between parts and distributes weights evenly. A weight-based, adaptive, node blending system was also put into action.
Implementing rotational control system: The clavicle is locked unnaturally when reaching extreme positions, limiting the rotational freedom. With a rotational control system, a gimbal lock could be avoided. However, it wasn’t as reliable in terms of precise linear motions and rotations were disruptive. Using quaternion rotations would be the last resort as it would make the rig more complex and lead to rendering issues. The rotational control system did not work as expected and I had to switch to quaternion rotations.
Debugging the IK chain: This turned out to be the most important step. By replacing the Euler angle-based IK solver with a quaternion one, the gimbal lock was eliminated. With simplified interpolations between rotated coordinates and the representation of rotations as 4D vectors instead of 3D angles the rotations were smooth and uninterrupted.
Pole vector adjustments: The pole targets were corrected and re-aligned to avoid any overlaps. The IK constraint settings were then adjusted to reorient the pole angle parameter in order to avoid any twisting issues that might trigger a gimbal lock on the joint.
Rig optimization: The dual hybrid IK/FK system allowed seamless switching, but also made the rig more complex. For this complex anatomy, I used an auto-rig plugin to analyze and optimize the rig with auto-detection; it ensured optimal bone placement in real time. The rig automatically adapted to different forms and movements without manual intervention. I also decided to add procedural controllers to enable dynamic adjustment of pole target placements.
Testing and refinement: This stage involved rigorous testing of the rig in extreme positions to verify and identify any rigging errors. To further refine the rig, more weight painting was adjusted along with specific pole vector joint adjustments that required more attention e.g. shoulder, elbows, etc.
Resolution :
1. Fluid and natural animations without any jitters or shakes became possible. The rotational limitations had smoother animations due to the equipping of the rig with an anticipatory procedural pole vector system that analyzed and optimized the rig in real-time.
2. The Gimbal lock was eliminated with the help of quaternion rotations. The joint issue was resolved, allowing free movements in any direction.
3. The hybrid solution involving mathematics, machine learning, and a procedural system was used to solve an IK issue in an innovative and personalized way.
4. The rig was now very well adapted to more complex settings and motions. It had now acquired scalability and flexibility for hybrid-complex creatures where Euler-based systems would fail.
The experience taught me how to deal with technical difficulties within a time constraint. It not only solved the gimbal lock issue at hand but also set me on a path of research and discovery to come up with an innovative solution to the problem. It allowed me to explore a 3D rigging solution with a modern outlook in 3D animation workflow.
Animation & Rendering
After the rig, the set, and the characters were ready, animation was done using a graph editor, curves, and referential rotoscoping. It is a time-consuming process as each expression/movement involves manual keying of poses with the use of object-based controllers. The final poses and movements were rendered as sequential images and then composited in Adobe After Effects. I used Arnold Renderer and the Mental Ray plugin for the final rendering. The title scene of the film was animated and rendered using Cinema 4D. Please see the images below from the pre-production, post-production, and production phases of the film, or click on the 'watch film' button to watch the film.


Ravenshaw Alley
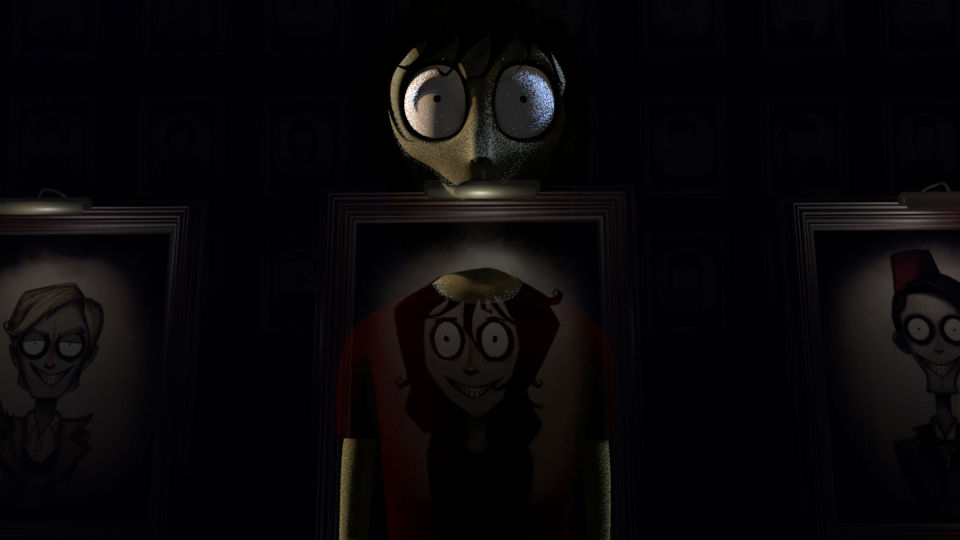
Ravenshaw Alley was my first Individual film so it holds a special place in my heart. I was immensely inspired by Tim Burton and his Art style while creating this short film. Furthermore, I found inspiration for the narrative in Oscar Wilde's Dorian Gray. It is a dark and gritty tale of a young girl who loses her youth to a painter while lost in her narcissism. Worth a watch if you are into gothic themes. The production pipeline was that of a 3D short film. Once the main character Lilith was designed and finalized, I modeled her into a 3D version and brought her to life with texturing, rigging and animation. Her interaction with the environment was crucial to the story and the theme I intended to set. Rendering was a new challenge I faced due to the high number of shadows present in the environment. With ray tracing, the hurdle was overcome and I eventually finalized the output. For post production I color graded the footages and created a film poster. The CD Cover depicts one of the final scenes of the film. This individual film as a student was my introduction to 3D film making experience.


bottom of page